Your grandmother's wedding dress in that 1955 photo. Your father's smile in that faded print. The house your family lived in before it was demolished.
These aren't just images. They're connections to people and moments that matter.
These photos hold memories. But they're deteriorating.
Professional photo restoration costs $50-200 per photo. And you have hundreds.
AI restoration gives you a chance to preserve them. To see them clearly. To pass them on to the next generation.
What AI Photo Restoration Does
AI photo restoration uses machine learning trained on millions of images to:
- Repair damage: Fill in tears, creases, and water damage
- Restore color: Bring back original colors to faded or discolored photos
- Improve clarity: Sharpen blurry images and enhance detail
- Remove artifacts: Eliminate dust, scratches, and grain
- Upscale: Make small photos larger without losing quality
- It's not perfect. But it's fast, affordable, and good enough to save memories that would otherwise be lost.
The Process: Start to Finish
Step 1: Digitize Your Physical Photo
If you have a physical photograph, you need to turn it into a digital file first.
Option A: Scan it
- Use a scanner if you have one (best quality)
- Scan at 600 DPI or higher for best results
- Save as JPG or PNG
Option B: Photograph it
- Use your phone camera
- Take it in good natural lighting
- Avoid shadows and reflections
- Make sure the whole photo is in frame
Why it matters: The quality of the digital version determines the quality of the restoration. A blurry phone photo will give worse results than a clean scan.
Step 2: Upload to AI-PRO
Log into AI-PRO. Choose the image restoration tool. Type what you want to do with it.
Sample prompt: "Restore this old family photo. It's faded and has a color shift. Bring back the original colors and remove any damage or scratches."
That's all you need to say. The AI handles the rest.
Step 3: Review and Refine
Look at the result. Ask yourself:
Does it look natural? AI sometimes over-corrects colors or makes faces look waxy.
Did it fix the main problems? If the photo was faded, did it restore color? If it was blurry, did it sharpen?
Does it feel like the original photo? Good restoration should feel like "this is what the photo always looked like," not "this is heavily edited."
If you're not satisfied: Adjust by prompting again:
- Color saturation (boost if still faded)
- Sharpness (increase if still blurry)
- Contrast (adjust if colors are flat)
Step 4: Export and Save
Once you're happy with the result: Save it. That's it.
Pro tip: Keep both the original and restored versions. The original is irreplaceable documentation.
Real Examples: Before & After
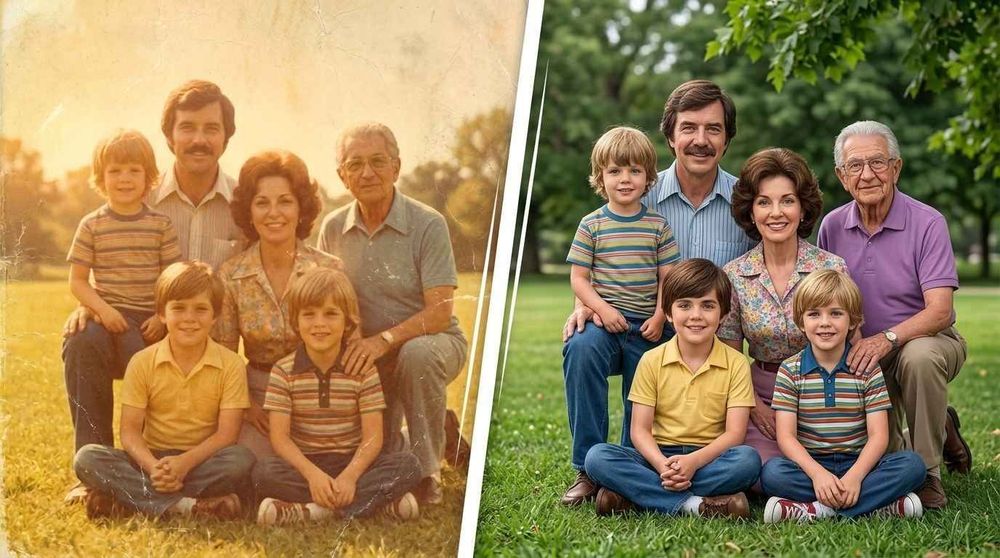
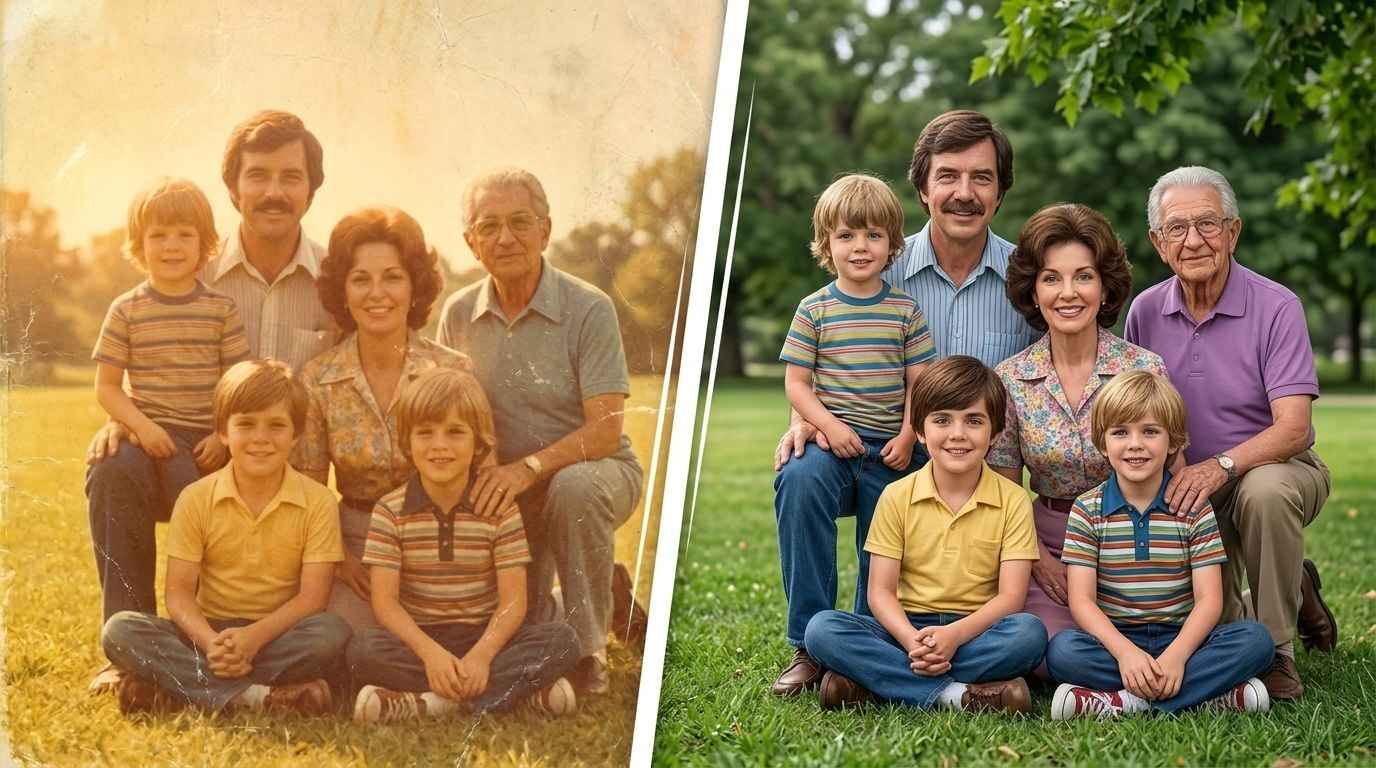
Example 1: Faded Color Photo
Before: A photo from the 1970s has shifted to yellowy-orange. Colors are muted. Details are hard to see.
What the AI does: Analyzes the color shift and restores it to what the original likely was. The sky becomes blue, and the grass becomes green.
Result: The photo looks like it was taken yesterday, not 50 years ago.
Example 2: Blurry Family Photo

Before: A photo is slightly out of focus. Faces aren't sharp. Details are soft.
What the AI does: Sharpens the image, enhances edges, clarifies facial features.
Result: Suddenly you can see details you couldn't before, expressions, clothing, background details.
Getting Started
You don't need expensive software. You don't need technical skills. You don't need to understand machine learning.
You just need access to photo restoration tools and a willingness to spend a few minutes per photo.
AI-PRO gives you access to AI models that have photo restoration and enhancement capabilities without paying for separate subscriptions or navigating complicated software.
Upload your photos. Restore them. Preserve your family history.
Try AI-PRO today and bring your old family photos back to life.